


How do you install fiberglass roof penetrations to prevent leaks?
Installing fiberglass roof penetrations is easier when you follow a clear plan. However, each detail matters because water finds small gaps. Therefore, you need the right parts, clean prep, and careful sealing. In this guide, Alpha & Omega Fiberglass explains proven steps for durable results.
How do you install fiberglass roof penetrations to prevent leaks?
To install fiberglass roof penetrations, measure carefully, prep the surface, and seal each edge in layers. Moreover, choose compatible parts, tighten fasteners evenly, and confirm drainage paths. Alpha & Omega Fiberglass recommends a final inspection after curing to catch pinholes early.
Parts that make up fiberglass roof penetrations
First, understand how each component blocks water movement. Then, you can match parts to your roof geometry and exposure.
Pipe boots: These wrap pipes and shed water away from openings.
Curb transitions: These bridge elevation changes and support smooth runoff.
Skylight frames: These create a firm perimeter and stable sealing surface.
Cable tray seals: These compress around wiring and close tiny pathways.
As a result, fiberglass roof penetrations stay watertight when every interface sits flat.
Choose materials that last in real weather
Start with materials designed for movement and UV exposure. Additionally, verify chemical compatibility with fiberglass laminates and sealants.
Select fiberglass roofing sheets that fit the roof slope and drainage plan.
Choose flexible pipe boots that resist cracking during temperature swings.
Pick corrosion-resistant skylight frames with reliable fastener channels.
Use cable tray seals with gaskets that compress evenly around bundles.
Consequently, fiberglass roof penetrations resist fatigue and stay sealed longer.
Need local guidance? Consider service teams listed on Experience Fiberglass Roofing in Phoenixville, PA Now for nearby support.
Prep the roof surface before cutting openings?
First, remove debris and old sealant because residue weakens adhesion. Next, wash the area with mild cleaner and rinse fully. Then, let the surface dry completely before any sealing work.
Afterward, inspect for cracks, dents, or warping. If you find small defects, patch them with a compatible fiberglass repair kit. Therefore, pipe boots and curb transitions can sit flush without hidden voids.
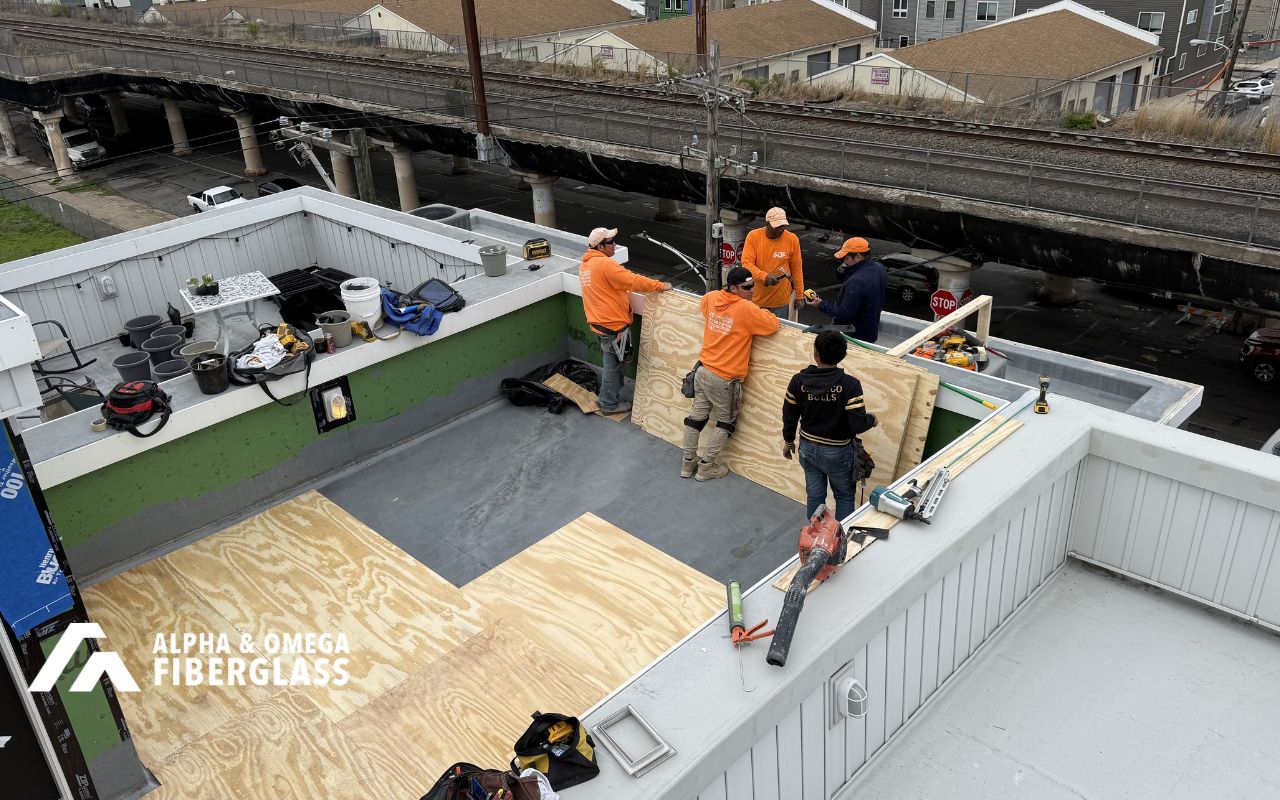
How to install fiberglass roof penetrations step by step
Follow these steps in order because each one supports the next. Moreover, keep measurements and layouts consistent across the roof.
Mark each opening and confirm spacing from seams and low spots.
Cut or drill cleanly, and then remove dust from the edge.
Dry-fit all parts to confirm contact and alignment.
Prime the bonding zone when the system requires it.
Apply roofing-grade sealant, and then set the component into place.
Fasten evenly, and then seal the perimeter with a continuous bead.
Tool the bead smooth, and then check for pinholes and gaps.
Let materials cure fully, and then re-check after the first rain.
In addition, Alpha & Omega Fiberglass can review scope details using Our Fiberglass Roofing Process | Alpha & Omega Fiberglass.
Fit pipe boots without wrinkles or leaks
First, measure the pipe diameter accurately. Then, select pipe boots that slide on without forcing. After placement, add a thin sealant bead at the base and press the skirt flat.
Next, fasten where recommended, yet avoid over-tightening. Consequently, fiberglass roof penetrations around pipes stay stable during expansion and contraction.
Align curb transitions for proper runoff
Before bonding, place the curb transitions and confirm they match the roof pitch. Then, mark the outline and lift the piece. Next, spread adhesive evenly within the mark and reset the transition carefully.
Afterward, seal all edges with a continuous bead and tool it smooth. Therefore, fiberglass roof penetrations at level changes resist ponding water.
Install skylight frames and protect the perimeter
First, center the skylight frames and confirm the opening is square. Then, fasten with hardware designed for fiberglass surfaces. Next, apply a continuous sealant bead where the frame meets the roof.
Moreover, tool the bead to remove air pockets. As a result, fiberglass roof penetrations around skylights remain protected during wind-driven rain.
Secure cable tray seals around wiring bundles
Plan the cable route early because later changes can disturb seals. Then, place cable tray seals around the bundle and confirm full gasket contact. Next, add sealant under the flange and press down firmly.
Finally, tighten fasteners evenly so compression stays uniform. Consequently, fiberglass roof penetrations around cables stay closed to moisture.
Waterproofing layers help fiberglass roof penetrations last longer
Use a system approach because one barrier can fail over time. First, apply primer when specified for adhesion. Next, install a compatible membrane layer under flanges when appropriate.
Then, apply roofing-grade sealant to every edge, corner, and fastener line. Moreover, smooth the bead to force sealant into micro-gaps. Therefore, fiberglass roof penetrations gain redundancy and longer service life.
Mistakes cause early leaks, and how to avoid them
Most failures happen because steps get skipped. However, simple checks prevent costly call-backs.
Rushing measurements, which causes misalignment and exposed gaps.
Using too much sealant, which can crack and collect debris.
Using too little sealant, which leaves pathways for capillary leaks.
Mixing incompatible products, which reduces bond strength on fiberglass.
Therefore, fiberglass roof penetrations perform best with patient, repeatable methods.
If you need area support, review Fiberglass Roofing in Norristown, PA | Durable Roof Solutions for service coverage details.
FAQs
How long should sealant cure on fiberglass roof penetrations?
Cure time depends on the product, temperature, and humidity. Therefore, follow the manufacturer schedule and avoid early water exposure. For process guidance, use Our Fiberglass Roofing Process | Alpha & Omega Fiberglass.
Do I need primer before sealing around pipe boots and frames?
Sometimes you do, especially when the system requires enhanced adhesion. Moreover, primer can improve bonding on older surfaces. For general guidance, check Fiberglass Roof & Deck FAQs in Philadelphia | Alpha & Omega.
What’s the best way to prevent leaks at skylight frames?
Use proper alignment, even fastener spacing, and a continuous tooled bead. Additionally, consider a secondary membrane under the flange. If you want installation support, see Experience Fiberglass Roofing in Phoenixville, PA Now.
How do I know if curb transitions are set to drain correctly?
Confirm the transition matches roof pitch and avoids low spots. Then, run a controlled water test after curing. For localized service options, reference Fiberglass Roofing in Norristown, PA | Durable Roof Solutions.
When should I call a professional for fiberglass roof penetrations?
Call a pro when you see repeated leaks, soft decking, or complex penetrations. Moreover, professional crews can reduce disruption and rework. To reach Alpha & Omega Fiberglass quickly, use Contact Us | Alpha & Omega Fiberglass Philadelphia, PA.
Plan your next steps with Alpha & Omega Fiberglass
If you want durable fiberglass roof penetrations, follow a repeatable checklist and verify every seal line. Moreover, small adjustments now can prevent major repairs later. Alpha & Omega Fiberglass can help you scope penetrations, confirm materials, and plan a clean install. Start by scheduling a conversation through Contact Us | Alpha & Omega Fiberglass Philadelphia, PA.
